

How To Partition A Hard Drive When Installing Windows 7
Create partition during Windows 7 installation procedure
During the installation of Windows seven, you need to create a partition to install the operating system. According to Microsoft'southward instructions, you must spend at least 16GB for this partitioning. However, this is only the smallest size and is recommended not to be so. As you lot know, the operating organization partition is the identify where more space should exist saved.
- How to create a Recovery segmentation to customize Windows recovery
- This is how to delete Recovery partition and Recovery segmentation 450 MB on Windows ten
During the installation of Windows seven, yous demand to create a sectionalization to install the operating system. According to Microsoft's instructions, you must spend at least 16GB for this division. However, this is only the smallest size and is recommended not to be so. As you know, the operating organization partition is the place where more than space should be saved. Applications such as hotfixes, patches, service packs will accept up a lot of space in this area. If you lot utilize these applications much, more space is needed.
This is why you lot should configure this partition accordingly. Yous can even so expand this partition simply information technology is better to plan ahead. Depending on the purpose of using the user's computer, this partition can be best placed in the range of 40GB - 100GB.
Showtime installing Windows seven, later on completing the first important step, the 2nd step will have to select the type of installation as ' Custom ' or ' Advanced '.

The side by side step will enquire where you want to install the operating arrangement, which ways where the partition you desire.
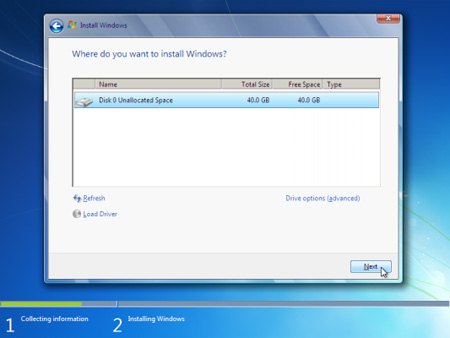
You take ii options in this step:
+ Install operating system on the unabridged hard drive.
+ Create a partition on the difficult drive and install Windows in that partition.
If you choose the beginning pick, just click on ' Next ' to stop. The installation program will create a sectionalization on the entire difficult drive and format the drive with NTFS standard. After that, the plan volition install Windows on this partition.
However, if yous choose the second option, you lot volition have to create a partition.
Get-go, click Drive options (advanced). The screen will automatically motion to the next step and show some options:
New - To create new partitions
Delete - To delete a partition, the information in that partition will be deleted.
Format - To format a partitioning completely, information in that sectionalization will too be deleted
Extend - To expand a partition from 2 different hard drives. This is beneficial for you when your hard drive is full while the other drive is still empty. Nonetheless, using this partition is non the aforementioned as using it on a unmarried drive. It may exist useful in some cases, but sometimes an error occurs. If an error occurs on a drive, all data in that extended drive will be unusable and may be lost.

To create a new segmentation, click ' New '. In the ' Size ' box, enter the size you want to create for the partition. Then click ' Utilise '.
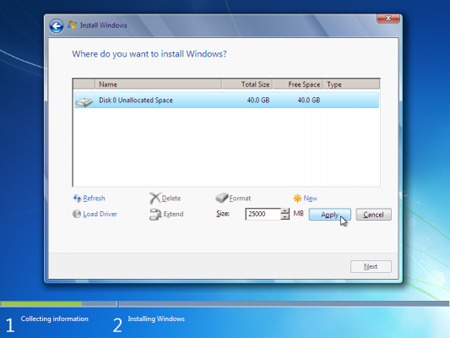
The installation program will notify you of an extra division that volition be created on the hard bulldoze. This partition will exist hidden by default and contains some of import files for booting the figurer.
Annotation : Even if yous don't want to create this sub-partition, Windows still creates information technology. Yet, if you want to create that subdirectory yourself, Windows will still notify you that another division will be created .

At present you lot tin can see the sectionalization you just created and the hidden sub-partitioning. In most cases, Windows will be installed in sectionalisation number 2.
Click ' Format ' to delete this new partition.
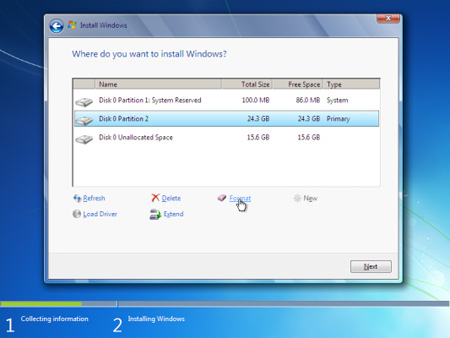
You will be notified that the data will be deleted. However, this is really unnecessary because the new partition is created and information technology is yet empty.

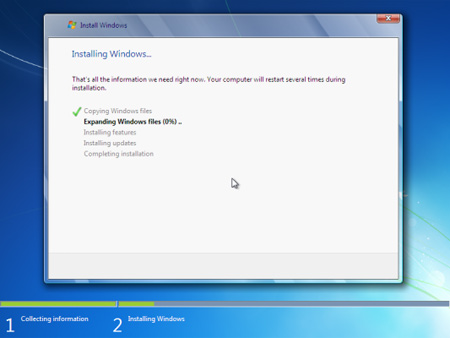
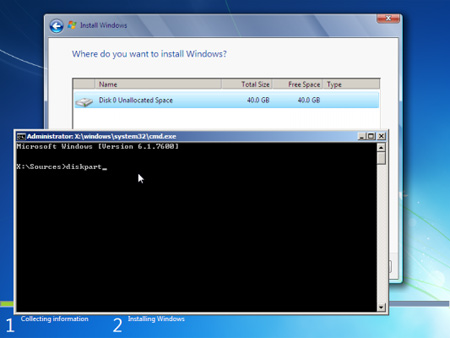
The installation process will go along as usual. In fact, there is another way to create partitions manually during Windows installation. You lot can exercise this when using the DISKPART command. This control is very useful when creating, expanding, performing other functions on partitions and drives. If you want this way, printing SHIFT + F10 when the installation programme is running.
The command window will appear, type the command ' diskpart '
An interactive command line will exist displayed.
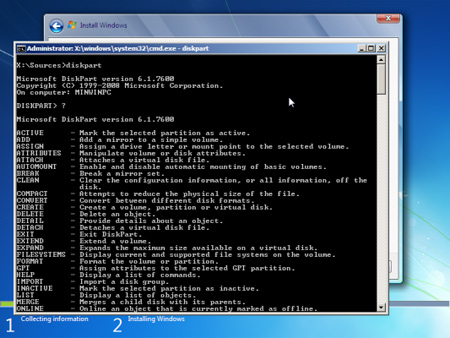
If yous need help from DISKPART, type ' /? '
Remember that you can change the size of the operating sectionalisation, but in that location will exist no changes afterward.
Source: https://tipsmake.com/create-partition-during-windows-7-installation-process
Posted by: winderfrouths.blogspot.com
0 Response to "How To Partition A Hard Drive When Installing Windows 7"
Post a Comment